Two-way switching is a convenient wiring set-up for a lighting fixture. This way, you can turn a light on and off from two separate switches, such as up and down the stairs. By knowing how to wire two switches to one light, you can save money by doing the work yourself instead of paying a pro to do it for you.
Wiring two switches to one light can be a quick DIY task if you know the right steps. In a nutshell, here are the things that you need to do:
- Start by Planning a Wire Path
- Prepare the Location of the Switches
- Run a 14-3 Cable
- Strip the Cable
- Connect the Wires
Read on to learn more about how to wire two switches to one light. It can be easy work if you have the right tools, knowledge, and patience to do the job.
How to Wire Two Switches to One Light
If you want to turn a light on and off from two locations, you will need a single pole double throw. The latter is also known as a two-way or three-way switch, depending on where you live. It has three terminals – one in and two out.
Below, we’ll share the things to do for the assembly of such a wiring set-up:
1. Start by Planning a Wire Path
To connect two switches, one light, start by determining the path where the wire will run. It is an effective way to visualize the scope of the work that needs to be done, making wiring easier. Run a cable from where you want to install the first switch to the location of the second switch. It will also let you know the length of the wire that you will need.
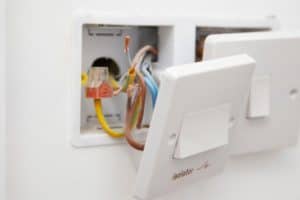
2. Prepare the Location of the Switches
Get ready by preparing the two switches on which you will be working. Before doing so, make sure that you have turned off the main power source to prevent electrocution. Take the cover plate off the existing switch. This step assumes that you have an existing switch:
- To remove the current switch, unhook the wire. In most instances, the existing switch box is too small for the installation of a three-way switch. With this, you will need a remodeling box, which will let you pull and hook a new cable. It has clamps to secure a wire that runs through drywall, eliminating the need to open the wall for the wiring installation;
- As you unhook the wire connections, label them properly. This way, it is easier to return them to their original position later on;
- Next, take the cable clamps and grounding screw off. Remove the box completely. If you are installing a bigger switch box, you might need to enlarge the wall opening depending on the size and shape of the new switch that you will install;
- Prepare is the second switch. You will need to make an opening if there is no switch, which will complicate the task. Otherwise, you can fine-tune its position;
- You will need a stud finder to locate any obstruction, especially one where the wire is passing through; and
- Outline the location of the switch and open it. This is a lot easier if you have drywall.
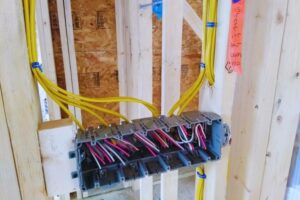
3. Run a 14-3 Cable
With the switch locations on both ends ready, the next thing to do is run a cable between them. Not just any cable will suffice. For this job, you will need a 14/3 cable. The specifics of this step will vary depending on the wall. Nonetheless, if you have an open wall, then it will be quick and easy:
- Between the middle of each stud on the two switches, drill a ¾-inch hole;
- Run the cable from one opening to the other. If going up and down is impossible, then you should run it horizontally in a finished wall; and
- In this case, you will need to cut a slot in a drywall and notch and tuck studs to position the cable.
4. Strip the Cable
After positioning the cable on the two switches, the next step is stripping:
- Use a utility knife to cut four to 12 inches off the cable on both sides;
- Use a wire stripper to remove up to ¾-inch of the insulation in the cable; and
- Create an open-end loop on both ends of the wire using needle-nose pliers. It is also important that you are familiar with the electrical code, which requires that at least .25-inch of the sheathing be visible in the box.
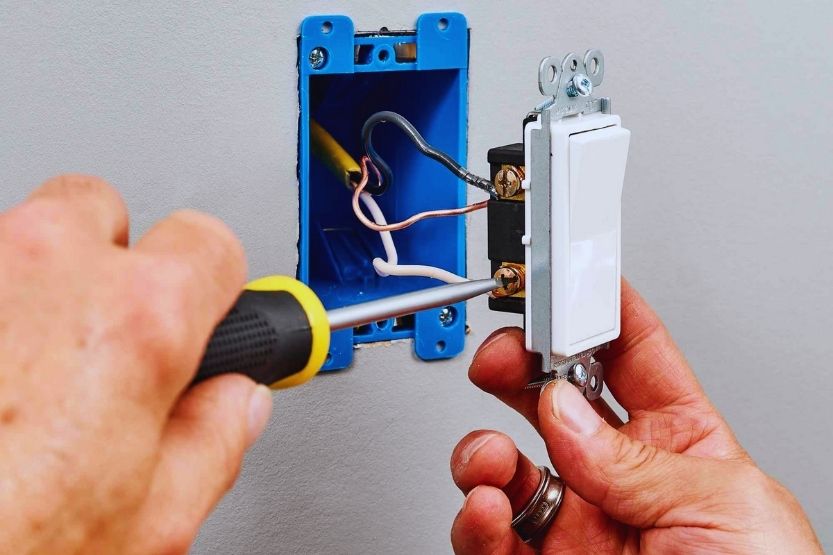
5. Connect the Wires
- Connect the 14-3 cable’s red insulated wire to the terminal of the first switch with a dark color. You will find it in the lower portion;
- Rotate clockwise to tighten the terminal screw;
- Connect the 14-3 cable’s white insulated wire to one of the two terminals and tighten;
- Once you are done, proceed to the second switch and connect the two wires to the right terminals;
- To finish, wrap electrical tape on the cables until you cover the sheath ends;
- Look for the two red wires of both switches and connect them. You will need to run a wire nut counterclockwise to do so;
- After the red, connect the two white wires;
- Connect the circuit power source’s black wire with the first switch’s black wire. Do the same to the white wire that connects the circuit power’s source to the light;
- Next, connect the light’s black wire to the black wire in the second switch;
- Follow it up by connecting the bare copper ground wire of the power source to the green grounding wire of the light. In each wire nut connection, use electrical tape to wrap the ends;
- Once you are done connecting the wires, put the switch boxes back in position;
- Tighten the screws and restore the power;
- Switch the light on and off to see if it is working. If not, turn the power off and inspect the wire, ensuring proper connections in the right terminals.
How Does a Two-Way Switch Work?

A two-wire switch is useful when you want to turn the light on or off from different locations. Among others, one of the most common applications is in a staircase. This way, you can turn on the light on a switch down the stairs and turn it off on the switch up.
More so, it is also common in bedrooms. You can turn the light on using a door switch and turn it off using a switch next to your bed.
It has one terminal going in and two terminals going out. Each terminal has its name. The one going in is common, while those going out are called normally closed and normally open. Once you switch the lever or toggle, the common terminal will connect to either a normally closed or normally open terminal, depending on the position.
Tips and Tricks for Installing Two Switches on One Light

You do not need to be a professional technician to complete simple wiring jobs. Nonetheless, it isn’t as straightforward either. For the best outcomes, take note of the tips that are mentioned below:
1. Stay Safe
Safety is a priority when you are installing switches at home. Especially if you are not a licensed electrician, it is easy to commit mistakes, resulting in an injury. The most important is to turn off the main power supply, eliminating the risk of electrocution.
Test the connections, making sure that there is no electricity. Wearing suitable gloves will also help to keep you safe. It is also crucial that you are careful with everything you are touching.
2. Have the Right Tools
Speaking of staying safe, you also need to invest in the right tools. Find ones from reputable manufacturers. More than their safety, it is also vital to have an ergonomic design, which will let you install the wires comfortably. You will need a wire cutter, needle hose pliers, and voltage testers, among other tools.
3. Use the Right Wires
Aside from the tool itself, you should also spend time looking for the right wires. Look for one that matches the power requirements of common lighting fixtures at home. Thick wires with excellent insulation are the best. Go for quality over price. If the wires are inferior, they can be burnt or damaged easily. Not to mention, it can quickly ask for a replacement.
4. Ensure Proper Position
To ensure safety and that everything works fine, see that you are connecting the wires properly. With his, one thing that can help is to label the ends of the wires, so you will know where exactly they fit. Alternatively, most wires will be color-coded, making it a snap to determine where to connect each.
5. Uncoil the Cable
This is a simple trick that a lot of people can miss. If you are putting a new wire between two switches, make sure that you straighten the cable. Pull it from the center and straighten it until you reach both ends. It will ensure the proper flow of electricity while also minimizing risks. Not to mention, it also simplifies handling.
6. Adding a Third Switch
If the room is extremely large and two switches for one light are not enough, then you have the option to add another switch. This time, however, you will need a different switch that is compatible with your wiring diagram.
In this case, what you will need is a cross switch. It has several inputs that cross it to various outputs. The installation is a bit complicated, but it can connect to multiple wires.
Conclusion – How to Wire Two Switches To One Light
From stairs to bedrooms, you will benefit from having two switches in one light. This means that you can turn it on or off in different locations. You do not have to do so in a single switch. This is possible with a three-way switch in North America and a two-way switch in Europe.
Rather than paying an electrician to wire to switches in a single light, you can do it yourself. It starts with mapping the path of the wire and preparing the switches. Run a cable from one end to the other.
This is easier if you have drywall, allowing the cable to pass through easily. Next, strip the wires and connect them to the right locations. Cover the switch box, turn on the power supply, and test if the switches are working.
Read next: