
The process of insulating rim joist areas is quick and easy. With the proper materials, you can do it yourself. There are various reasons why you should insulate rim joists in your home.
Insulating your house’s rim joist will ensure that there are no air leakages. It will also ensure that your home is free from pests, mold, and rotting. You could also cut on energy costs as the insulation will help keep the heat inside the basement.
To insulate rim joists, follow these 5 steps:
- Measure the joist’s spaces
- Cut the rigid foam
- Insert the foam
- Seal the gaps
- Use spray foam
Read on to learn more about insulating rim joists using different methods.
Insulating Rim Joists
Learning how to insulate your home’s rim joist is essential in keeping your house free from air leakages, pests, rotting, and mold formation. The insulation would cut your energy cost by around half as it will help keep the heat inside the area.
You must insulate your rim joists as you can gain several advantages from doing so. Note that you don’t have to hire someone to do it since you can easily perform the task yourself. First, you have to prepare your materials to seal and insulate your basement’s rim joists.
What Is a Rim Joist?
A rim joist appears as a box-like cavity found at the basement wall’s top to support a wooden floor’s frame. The rim joists are perpendicular to the joist that supports the floor’s weight. Several rim joists go around your basement’s perimeter to provide lateral support for the joists’ ends.
Keep on reading to learn how to insulate a rim joist.
Pros and Cons of Insulating Rim Joist Cavities
Insulating basement rim joist areas with spray foam is primarily advantageous because of many reasons. However, there are also some cons, and we listed them below as well:
Pros
- Higher R-value (the higher, the better)
- It prevents thermal heat from escaping the area.
- Eliminates mold and mold growth
- Prevents rot formation
- Enhances structural support
- Minimizes ice damages
- Reduces pollen and dust
- Prevents air and moisture entry
- Saves energy cost by 20 to 50% annually
- Reduces noise from external sources
- Stable and long-lasting
Note:
The R-value is the material’s thermal resistance
Cons
- You may need assistance to insulate a basement rim joist
- Spray foam using polyurethane may cause wood rot in timbers
- Beginners could find the spray foam messy and hard to control
Cheapest Way to Insulate a Metal Building
How to Insulate Rim Joists?
Materials needed for insulating rim joists:
- Tape measure
- Expanding foam sealant
- Rigid foam insulation
- Box cutter
- Long ruler
- Step ladder
- Protective gear (glasses and working gloves)
1. Measure the Joist’s Spaces
When you insulate the rim joist in the basement, use your tape measure to determine the rim joist’s height and weight or the spaces between the joists. Take note that the rim joist is different from the joist and the end joist.
2. Cut the Rigid Foam
Cut the foam according to the rim joist’s size using your box cutter and ruler. You have to cut the foam at least 1/8 inches less than the measurement so it would fit easily into the cavity. You could also use a wooden board in place of the foam.
3. Insert the Foam
Insert the cut foam into the area or cavity. Remember to remove old fiberglass before placing the new one. The new foam should slide easily into the cavity. You could add glue to the foam’s back portion so it could stick to the cavity.
4. Seal the Gaps
Seal the gaps around the foam’s edges. This step will seal the gaps between the joists and the floorboard. You can use an expanding foam sealant to close the gaps thoroughly. You can then return the fiberglass over the sealed foam to filter dust and dirt.
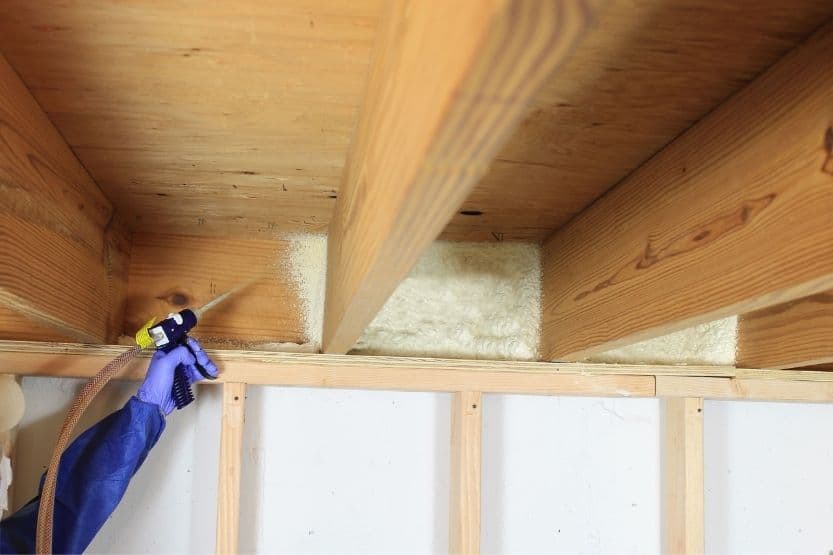
5. Spray Foam
You could also use spray foam to insulate your rim joists. Using spray foam is the fastest way to seal and insulate the rim joist in the basement. It would be best to use the spray in multiple layers to eliminate leakages.
What Is the Difference Between a Band Joist and a Rim Joist?
Rim joists may also be known as band joists, but there is a difference between the two. The rim joists are attached perpendicularly to the joists and referred to as a singular component.
Builders refer collectively to both the rim joists and the end joists as the band joists. Hence, the band joists include the end joists as well.
FAQs When Installing Rim Joists
Is Insulating Rim Joists Worth the Money?
Installing rim joists is definitely worth the money. Sealing and insulating your rim joists are beneficial for your comfort, health, and pocket. You may spend more than your budget, but the rewards will be more.
You may repair your rim joists at a later date; however, that would be after several years when you have recouped your expenses. You can repair your rim joists by repairing the band board. This task could cost from $30 to $40 per foot.
Do You Need to Double the Rim Joists?
You could install double rim joists to increase your deck’s rim or perimeter’s strength and rigidity. Installing blocking around the perimeter can also strengthen the deck’s foundation.
You should install the double rim joists across long lateral sections to allow even distribution across the deck’s frame.
Nevertheless, for smaller deck frames, you may not need to double your rim joists. You have to consult a professional when deciding on crucial aspects of your house. Your safety must still be your top priority.
What Is the Use of Acrylic Caulk When Insulating Rim Joists?
You can use the acrylic caulk to form an airtight barrier around each foam section. Run it around the foam’s edges to ascertain that there are no leaks. You can then apply foam sealant to large gaps that are more than one-fourth inch.
Many online and offline stores offer different foam sealants. Choose a product that you could easily use by yourself.
Do-It-Yourself vs. Professional Rim Joists Insulation Cost
Of course, DIY is cheaper than hiring an expert. The average cost for insulating your rim joists using spray foam is between $1,200 and $1,500.
However, if you are a newbie, it would be better to hire a professional. The service will cost between $2,500 to $4,000.
The price will also depend on the size of the basement floor and the materials used.
Remember to ask questions in cases when you have hired a professional to do it. How many years will the insulation last? What should you do to maintain the seal properly?
To know more about insulating rim joists, see the below video:
Again, several advantages result in insulating rim joist cavities. Insulating your rim joists will guarantee that your home is free from air leakages, pests, mold formation, and rotting. You could save on energy costs as the insulation will prevent heat loss.
Next, let’s discuss some tips for insulating your basement’s rim joists.
Tips for Insulating Rim Joists Efficiently
1. Many Experts Don’t Recommend Fiberglass Batts
Fiberglass batts are excellent as filters to prevent the entry of dust, dirt, and pollen. However, air could penetrate fiberglass batts, and they usually condense, causing molds and rots. That is why experts recommend using rigid foam or spray foam first before putting the fiberglass batts.
Fiberglass is an affordable option for people with a limited budget. However, you may need an additional may be required in your attic or basement rim joists.
2. Using Spray Foam Is Preferable in Hard-to-Reach Areas
Use spray foam to insulate basement rim joist cavities that are hard to reach. You could also use spray foam in other areas as you wish, provided that you follow the product’s instructions carefully. Spray foams are beneficial for long-term use.
You could save energy and money by using spray foam insulation for your house. The price for your comfort and peace of mind is also priceless.
3. The Best Way to Insulate Rim Joists Is by Using Rigid Foam

Use the 2-inch thick extruded polystyrene due to its excellent ability to prevent leakage of air and moisture. Make sure that you seal the gaps completely using spray foam after placing the rigid foam.
Rigid foams are also easier to use for newbies as they can control the installation, while they may have difficulty applying spray foam.
4. Unsealed Rim Joists Increases Energy Cost
You can save hundreds of dollars every year by sealing your rim joists properly. You could cut your energy cost by 20% to 50% with proper sealing and insulation of your basement’s rim joists.
5. You Can Combine a Spray Foam and Foam Board for Better Results
Combining a spray foam and a foam board is an ideal way to obtain effective results. You could easily install the foam board first before sealing the gaps with the spray foam. This method will guarantee that you have sealed the rim joists adequately to prevent air and heat from escaping.
6. Use the Extruded Polystyrene Instead of the Expanded Polystyrene
The extruded polystyrene is more effective as a moisture and air barrier than expanded polystyrene. Please read the product’s instructions before using it.
7. Unsealed Rim Joists Could Leak More than Your Windows
You have to double-check that your rim joists are sealed and insulated properly. If you do not do this process efficiently, the rim joists could leak air and moisture more than your windows. It is best to invest in durable and proper materials than to lose hundreds of dollars later on.
8. Seal the Rim Joists from Top to Bottom
You have to seal the rim joist’s cavity from top to bottom even if you do not notice any leaks. Recheck the seal, especially at bay windows, plumbing areas, and similar structures. Airtight rim joists will prevent the formation of moist inside air that could condense on the rim joists.
9. Check the House’s Rim Joists If You Live in an Old House
Check the rim joists when purchasing or renting an old house. You have to inspect your rim joists whether they are insulated or not. Doing so will make your home comfortable and well-insulated, aside from reducing the energy costs significantly.
10. The Rim Joists May Become Wet When Condensation Occurs
Do not be surprised to find your rim joists wet. Condensation causes dewdrops or moisture formation in your rim joists. This occurrence happens because the area is cold enough.
If you notice moisture, black spots, or molds, it indicates that you may not have adequately sealed the rim joists. You could double-check and ascertain that you have sealed the leakage.
11. Seek Help When Needed
Do not be ashamed if you do not know how to insulate your rim joists. Although there are methods that you can do it yourself, you may need someone who knows everything about the task.
It would be best to request a professional to do the job instead of doing the task yourself and regretting it later.
12. Allow a Local Inspector to Visit before Starting
The inspector may require you to leave some rim joist areas uncovered for termite inspections. The inspector could also want you to add drywall to cover the new insulation. In some regions, insulating your rim joists is a local rule.
Thus, you must know the housing and building rules in your state to prevent paying expensive fines.
Conclusion – Insulate Rim Joist Areas
Insulating rim joist cavities is essential for your home. Insulating your house’s rim joists will guarantee that there are no air leakages and that your house is free from the following:
- Pests,
- Rotting,
- Heat loss, and
- Mold formation.
So, you must insulate the rim joist in basement areas to minimize heat loss and save energy costs.
Insulating your rim joists will also provide a comfortable, warm, and safe place for you to stay. Your house would be free from bugs, pollution, specks of dust, and pollen. You will also save money in the long run.
Again, to insulate rim joists, here are the steps you can follow and materials you can use:
- Measure the joist’s spaces
- Cut the rigid foam
- Insert the foam
- Seal the gaps
- Use spray foam
Related reading:
Cheapest Way to Insulate a Metal Building
Wood Baseboard Heater Covers – What You Need to Know