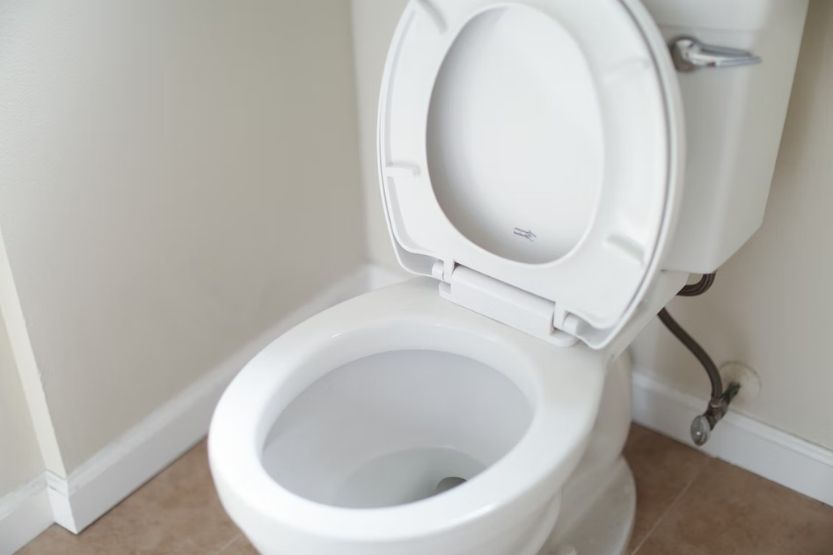
Very low water in the toilet bowl may not seem like something to be concerned about. But it could lead to serious flushing problems in the long run. To avoid this, you need to know how to get more water in the toilet bowl.
Here are three methods to choose fromto get more water in the toilet bowl:
Ball-and-Arm Float Adjustment
Cylinder Float Adjustment
Installation of a New Fill Valve
If there’s not enough water in the bowl, it could affect the flushing power. It can cause the toilet to clog.
If there’s too much water in the toilet, it may not be able to flush all the way, leading it to overflow. Fortunately, you can learn how to adjust the water level in the toilet bowl in three easy methods.
Read on to learn more about getting more water in the toilet bowl.
How to Get More Water in Toilet Bowl
If there’s not enough water in the bowl, it could impact the flushing power. Unfortunately, it can cause the toilet to clog.
If there’s too much water in the toilet, it may not be able to flush all the way. It will then cause it to overflow. But you can learn how to adjust the water level in the toilet bowl in three easy methods.
How to Get More Water in Toilet Bowl by Ball-and-Arm Float Adjustment
Here are the steps for using the ball-and-arm float adjustment method:
Remove the Toilet Tank’s Lid
Check the Toilet Tank’s Water Level
Turn Off Water Supply to the Toilet
Examine the Float-and-Fill Valve
Examine the Float Height of the Toilet Tank
Raise or Lower Float Height Using a Screwdriver
Test Water Level by Flushing the Toilet
1. Remove the Toilet Tank Lid
Lift off the toilet tank’s lid and set it down on a flat and stable surface. Toilet lids are made out of ceramic and can easily break. So be careful not to drop it or put it someplace where it could fall off.
Now that you have taken the lid off the tank, you will be able to access the flushing mechanisms inside it.
2. Check the Toilet Tank’s Water Level
The water inside the toilet tank should be resting 1 to 2 inches below the fill valve and the overflow tube. This tube is the large open pipe close to the center of the toilet tank. If the water appears to be higher or lower than that level, the water level could be off-balance.
The toilet might also have a line in the tank, either etched in or printed on porcelain. This shows where the water level has to be.
3. Turn Off Water Supply to the Toilet
Look for the external water valve on the wall behind and below the toilet. Turn the knob clockwise until you hear that the water has stopped running. Afterward, flush the toilet.
After the toilet has flushed, the toilet tank won’t refill itself. This allows you to work inside it unhindered. Ensure that the tank has emptied before you try adjusting or repairing any of the flushing mechanisms inside it.
4. Examine the Float-and-Fill Valve
Examine the flushing mechanisms to determine what their condition is. If you find any glaring defects or damages, you may have to call a professional plumber to repair them. Otherwise, continue to the next step.
5. Examine the Float Height of the Toilet Tank
Examine the toilet tank’s float, a plastic ball connected to a long arm on the fill valve. After refills, the float’s height determines how much water is left in the toilet tank.
The float should be at the water level if it isn’t broken. If the float seems too high or too low, adjust its height. Then check how the water level changes when you refill the tank.
If the float is above or below the level, it could be the high or low water level source. Give the float a shake. Then, if you hear water inside, have it replaced by a plumber. Make certain that the float is connected correctly to the fill valve.
6. Raise or Lower Float Height Using a Screwdriver
Locate the single screw found directly at the top of the fill valve. Then turn it either clockwise or counterclockwise in one full rotation. Turning the screw clockwise raises the water level while counterclockwise lowers it.
Don’t turn the screw more than one full rotation at a time. If you make too large an adjustment at once, it may cause the toilet to flush erratically.
Suppose it is difficult to turn the screw because it is too rusty. You may adjust the float simply by turning it. The float is threaded to the metal rod directly connected to the fill valve.
7. Test Water Level by Flushing the Toilet
Turn the water supply on and allow one or two minutes to fill the toilet tank. After flushing the toilet, closely observe the water level in the toilet bowl. It should ideally be about halfway full.
However, if you still have too high or too low water in the toilet bowl, empty the tank and keep trying to adjust the float. If the water level is still uneven after several attempts to adjust the float, call a plumber to get a look at it.
Again, how to get more water in toilet bowl? You can use any of the methods below to get more water in your toilet bowl:
How to Get More Water in Toilet Bowl by Cylinder Float Adjustment
To use the cylinder float adjustment method, here are the steps:
Identify the Cylinder Float
Remove the Toilet Tank Lid
Turn Off Water Supply Before Working on the Float
Locate Adjustment Stem on the Side of the Float
Check for the Float’s Release Clip
Raise or Lower Float by ½ inch (1.3 cm)
Test Toilet Level Height After Turning the Water Valve On
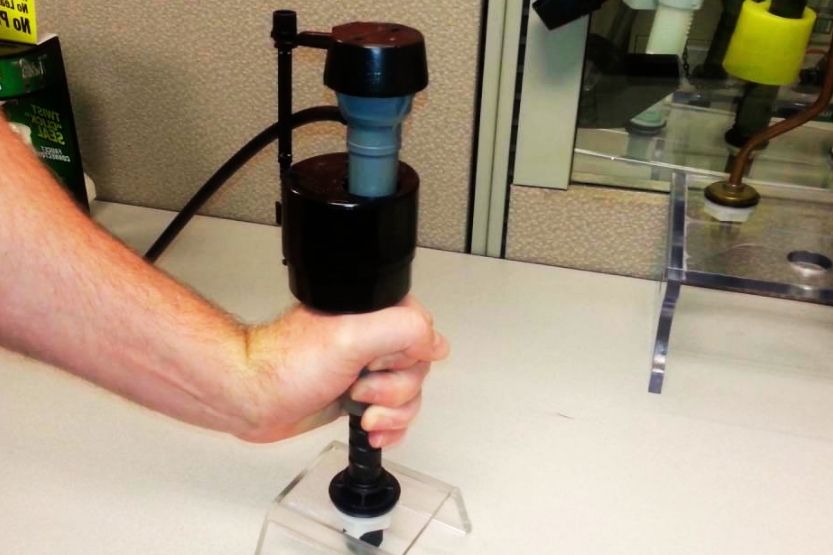
1. Identify the Cylinder Float
Some newer toilets come with more modern 1-piece floats, also known as floating cups, rather than the older type of ball-and-arm. These newer float types are designed as solid cylinders fitted to the fill valve’s shaft.
Easy to install, remove and do maintenance on, cylinder valves are more user-friendly for those with little experience in home repairs. If your fill valve has a cylinder float, you will be able to adjust your toilet’s water level in only a few seconds.
2. Remove the Toilet Tank Lid
Lift the toilet tank’s lid and set it on a flat, table-like surface. Again, ceramic lids break easily. So, don’t drop it or place it close to a surface’s edge.
Once you have removed the lid, check the water level. You may need to adjust if it is higher or lower than 1 to 2 inches (2.5 to 5.1 centimeters) below the fill valve and the overflow tube.
3. Turn Off Water Supply Before Working on the Float
Find the external water valve on the wall behind the toilet and under the bowl. Turn the knob clockwise as far as you can. Once you can’t turn it further, flush the toilet and keep flushing until the toilet tank is empty.
4. Locate Adjustment Stem on the Side of the Float
The adjustment stem is a long slender tube attached to the larger fill valve. It either runs parallel to the valve or horizontally extends from the top on most models. It is used in increasing or decreasing the amount of water in the toilet tank.
Acquaint yourself with the flushing mechanisms inside the toilet tank before making any drastic changes. Consult your instruction manual or the manufacturer’s website if possible.
5. Check for the Float’s Release Clip
Certain cylinder floats may be positioned by squeezing the release clip on the float. Then, by raising or lowering it to the height that you want. The water level will likewise rise or drop when you raise or lower the dial.
If your float comes with a release clip, squeeze it to adjust the float to the height you desire. If it doesn’t, you will have to find the adjustment dial of the toilet.
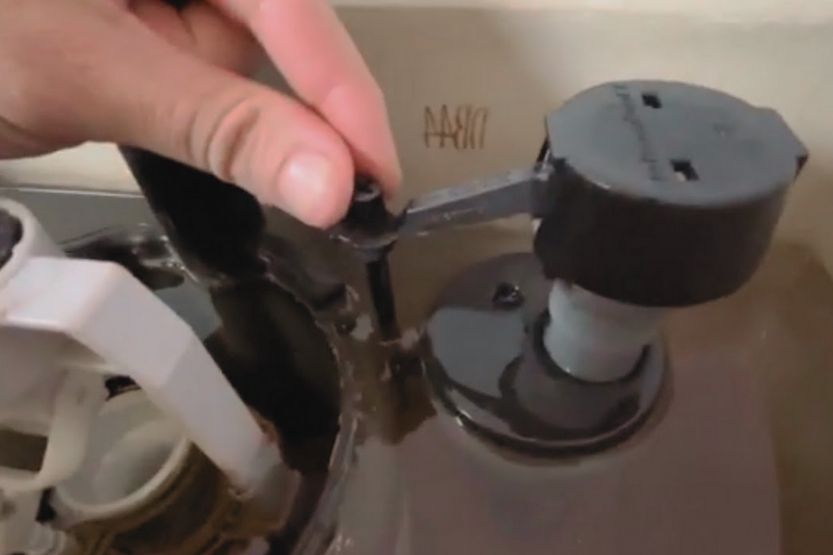
6. Raise or Lower Float by ½ inch (1.3 cm)
Using two fingers, grasp the notched dial at the end of the stem. Twist the stem either clockwise to lower the height or counterclockwise to raise it in a full rotation.
If you’re having difficulty rotating the adjustment stem, look for a screwdriver notch. Adjustment dials are sometimes secured with screws. Don’t turn the notch more than a full rotation at a time. If the toilet water level is adjusted too suddenly, it may cause the toilet to flush inconsistently.
After finding the proper height for the float, place the toilet lid back on. Then, turn the water supply on again.
7. Test Toilet Level Height After Turning the Water Valve On
Flush the toilet two times to check if the water level in the toilet bowl has been raised or lowered. The bowl should ideally be about halfway full, but if it isn’t, continue adjusting the float until the desired height is achieved. Call in a plumber if the water level remains off after several adjustments.
How to Get More Water in Toilet Bowl by New Fill Valve Installation
To use the fill valve installation method, here are the steps:
Replace Fill Valve If the Adjustments Aren’t Helping
Turn Off Water Supply and Drain the Toilet Bowl
Detach Fill Valve from the Outside of the Toilet Tank
Lift the Old Valve Out of the Toilet Tank
Slide New Fill Valve into Place
Reattach the Water Supply Hose
Turn Water Supply Back On, and Test Flush the Toilet
1. Replace Fill Valve If the Adjustments Aren’t Helping
If your toilet keeps running and adjusting the height of the float isn’t working, you may need to get the fill valve replaced. Replacing the valve will involve opening the toilet tank’s base hole. If you are not comfortable doing extensive work on your toilet, call a plumber to do it.
The fill valve you’ll need may vary according to the type of toilet you have. Before buying a fill valve, go online and find the kind of valve needed by your toilet model.
You may also purchase a universal toilet repair kit from a department or hardware store. The kit will include a new valve, float, and flapper that can fit in almost any toilet.
2. Turn Off Water Supply and Drain the Toilet Bowl
You must drain the toilet tank entirely to install the new fill valve. Find the external water valve behind and below the toilet. Turn the knob until it can’t go further and flush the toilet.
After flushing, the tank will not refill itself. Keep flushing until the toilet tank is completely emptied of water. Use a towel or sponge to sop up any remaining water residue in the tank.
3. Detach Fill Valve from the Outside of the Toilet Tank
On the outside of the toilet tank, you should find two nuts. Unscrew the nut connected to the water supply line to the fill valve. Pull out the supply line from the valve and unscrew the plastic nut. This will secure the valve to the tank. After unscrewing both nuts, expect the fill valve to come right out.
You may have to use a pair of pliers or a wrench to loosen the nuts. Lay a towel down just in case residual water starts leaking from the detached water supply hose.
4. Lift the Old Valve Out of the Toilet Tank
Remove the whole fill valve unit. This includes the attached float. The entire valve unit should easily come out in one piece.
Be careful in extracting it so as not to damage or dislodge the other mechanisms within the toilet tank. Dispose of the old fill valve unless you intend to get it repaired later.
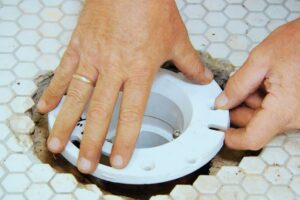
5. Slide New Fill Valve into Place
Fit the bottom part of the fill valve into the hole at the base of the toilet tank. Make sure that the valve is installed correctly. Doing so will make the rest of the unit firmly sitting upright without moving around or wobbling.
Ensure that it’s securely attached to the tank’s base before reassembling the toilet.
6. Reattach the Water Supply Hose
Reattach the hose to the bottom of the fill valve. Then slide it back on any washers that connect the small water supply hose to the toilet tank’s base. Tightly screw the large nut back on to prevent leakage when turning on the water supply.
7. Turn Water Supply Back On, and Test Flush the Toilet
Rotate the external water valve clockwise to turn the water supply back on. Test the water by flushing the toilet several times. Then check the water level.
Also, inspect the water shut-off valve and the bottom of your new fill valve. Use a tissue to wipe traces of moisture. Tighten any loose connections if needed. Call a plumber to deal with the problem if the water level is still off.
You can use three methods to get more water in the toilet bowl. They include the following:
Ball-and-Arm Float Adjustment
Cylinder Float Adjustment
Installation of a New Fill Valve
If you find too much or too little water in your toilet, you must address the issue right away. When you know how to adjust the water level in the toilet bowl, you can do so in only minutes. But if the problem persists, call a professional plumber to help you.