
Furring out a wall is a practice that most housebuilders do. This is a building process they often perform to achieve a certain purpose. Furred out wall – what is it, and what are its benefits?
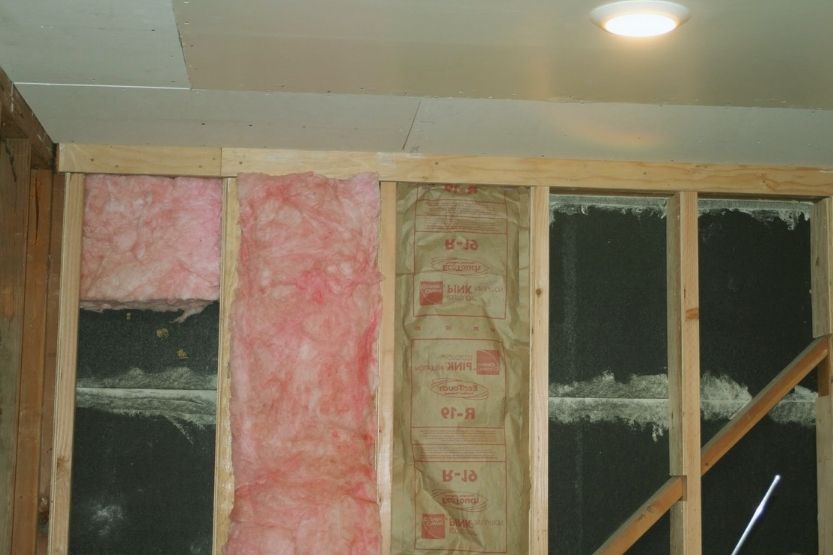
A furred out wall is a wall where thin strips of wood or other materials are added to improve its insulation. By improving the insulation of your home or business, its inner spaces will be cooler in the summer and warmer in the winter. This will help reduce the cost of your electric bills.
If you have furred out walls, it can prevent dampness or moisture from entering the structure. Furring out a wall will also improve its appearance if there are uneven portions on its surfaces. The thin wood strips are worked into the wall to make the entire wall surface straight and even.
Read on to learn more about furred out walls, their many benefits, what is involved in this process.
Furred Out Wall
Wall with Added Thin Strips of Wood or Other Materials
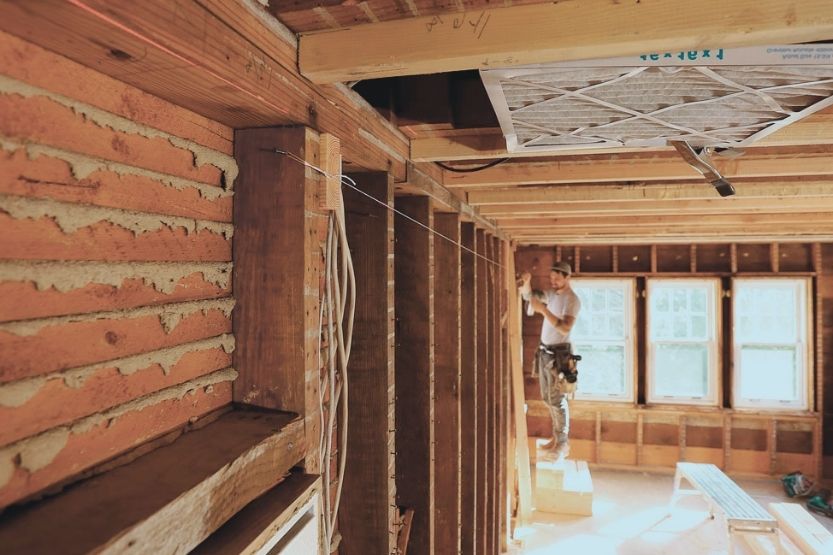
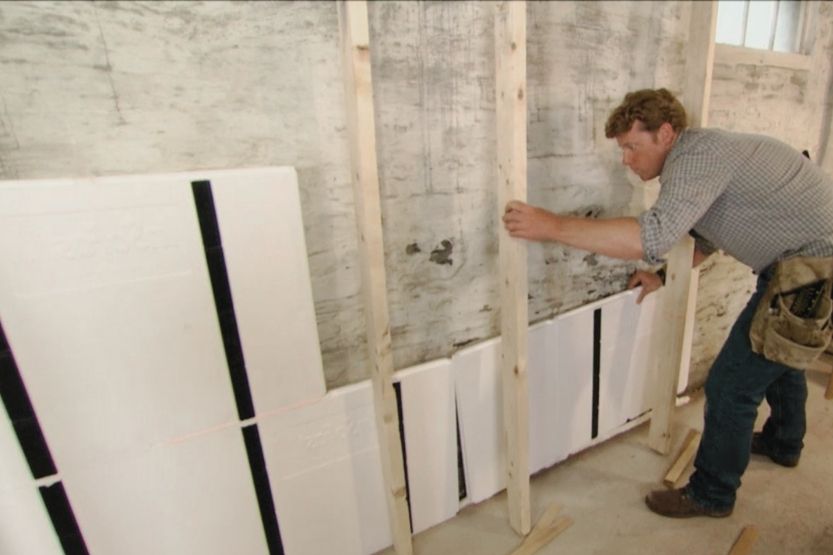
A furred out wall is a wall that has been reinforced with thin strips of wood or other materials to achieve its intended purpose. Furring out a wall is achieved by adding thin strips of wood or other materials to its wall structure.
Improve Wall’s Insulation
There are many reasons why builders furr out a certain wall. Some do it to improve the wall’s insulation. A furred out wall will reduce the need to heat the room during winter or warm it during summer. So, you will reduce your electricity bills by furring out your walls.
Improve Appearance
If the walls have an uneven surface, you can improve their appearance by furring them out. By furring out the wall, you can raise the level of some portions of the wall to make them even to the level of the rest of the wall.
In specific terms, furring out a wall means trimming or lining it by applying strips of thin wood, metal, or brick to studs, joists, or directly to the wall. The intent is to create an air space or to level the surface of the wall.
Expand Wall’s Thickness
So, this process will enable you to expand the thickness of the wall with the addition of the furring strips. Some builders describe this process as the creation of one wall inside another wall.
Builders Sometimes Use Furring Channels
There are times when builders use furring channels to furr out concrete walls or ceilings. These channels are available in 7/8-inch width and one 1/2-inch height. The bearing surface of these channels is 1 1/4 inches. Their thicknesses usually range from 18, 27, 30, and 43 millimeters (mm).
Benefits of Furring Out a Wall
Homebuilders and construction companies furr out walls because of the benefits it brings. Here are some of the primary benefits of furring out a wall:
1. Improve the Wall’s Insulation
One of the great benefits of a furred out wall is that it improves its insulation. It is one process that will prevent the outdoor temperature from affecting indoor temperature adversely. A furred out wall will keep your home or business warm during winter and cold during summer.
This will greatly reduce the cost of your electricity and will help prolong the life of your HVAC (heating, ventilation, and air conditioning) equipment because it will not be overworked.
2. Improve Wall’s Appearance
If you furr out your wall, you will be able to fix the imperfections on its surface. Uneven surfaces on your wall will be straightened and evenly leveled if you fur them out. You can do the same to your ceilings too.
If plumbing pipes or chases can’t fit in the standard wall framing, you can furr out that wall so that the wall finish will be straight instead of the wall surface going around the pipes.
3. Adding Finish, Drywall, or Paneling Is Easier
If you furr out a wall, it will be easier to add drywall, paneling, or another finish. This is ideal if you are planning to add a built-in cabinet to your bathroom or kitchen. You can add the cabinet on the right level and securely to the furred out wall.
4. Create a Sound Barrier
If you need a quiet room to study, use it as your home office, or a bedroom for light sleepers, you can furr its walls. Furring out the walls will make it somewhat soundproof because it will make the walls thicker. It will not be 100% soundproof, but it will reduce the noise coming from outside.
5. Make the Wall Thicker
If you want to make the wall thicker, your best option is to furr it out. The process requires you to add or attach thin strips of wood or metal, or other materials to make the walls thicker. By doing this, you will not just thicken the walls, but you will also improve its insulation, sound barrier capabilities, and appearance.
Again, what is a furred out wall? Builders furr out a wall using furring strips to expand a wall’s thickness. Furring strips refer to strips of wood, metal, or other materials you can use to build an inside wall.
Things to Consider Before Furring Out a Wall
While it is great to have your walls furred out before you do it, there are certain things that you need to consider first:
1. You May Need a New Window Casing
After you furr out a wall section, it will stand out from the rest of the wall surface. If the furred out wall is near a window, you may need to install a new window casing because the walls in that section will be thicker than the original wall.
After you have furred out your wall, expect a reduced livable space. The thicker wall will eat up space so that the room will be smaller than before. You may have to adjust or rearrange the furniture inside the room.
2. Remove Radiators, Light Switch Covers, etc. Before Furring Out the Wall
If radiators, light switch covers, doors, or anything in the way of the wall concerned, they have to be removed before you start furring out the wall. After you have furred out that wall, you can re-attach whatever items you have removed.
3. Install a Panel or Drywall After Furring Out a Wall
After you furr out a wall, it will need a panel or drywall. If you neglect to do this, it will result in heat loss and increase your electric bills.
4. Remove Base Wall Paneling Before Starting
Before you start furring your wall, you may have to remove the trimmings and the base wall paneling. Once you have furred out the wall, you need to reattach whatever it is you have removed. Some of the trim or paneling may not fit the new wall. So, note that you have to replace them with new ones.
How to Furr Out a Wall with Wood Studs
There are some considerations you have to make before you can furr out a wall with wood studs:
1. Space Out the Furring Strips
You need to space out the furring strips the same way you will do with brick or concrete. Make sure that the vertical lines you draw are directly over the wood studs.
2. Locate the Studs by Using Stud Finder
In some homes, the spaces will be about 16 inches apart. But if your situation cannot accommodate this, you have to adjust the spaces. If it’s hard to locate the studs, use a stud finder. They are available in most home improvement and hardware stores.
3. Draw Vertical Lines Above the Wood Studs
When you have located the wood studs, you can draw vertical lines directly on them from top to bottom of the wall. Then drill the holes and insert the anchors. Ensure that the space between the anchors is around 8 to 10 inches.
4. Apply One Adhesive Coating
Some builders apply one adhesive coating to one side of the furring strips before they attach and screw them or pound in the nails. The adhesive will serve as a support to the furring strips that hold the wood paneling or drywall.
5. Ask the Help of a Qualified Carpenter If You Don’t Have the Skills
If you have adequate handyman skills, you can do this job and save some money. But if this is your first time, and you are not confident in doing it, it is best to ask the help of a qualified carpenter.
How to Furr Out a Concrete Wall
If it’s a concrete wall that you want to furr out, it can be a bit difficult if you don’t have any experience in doing it. But if you know how to do this and have the experience, you can save a lot of money instead of hiring a contractor to do the job.
Tips Before Furring Out a Concrete Wall
Here are some considerations before you start:
- If you want to use plaster to attach the furring strips, you should space the strips a bit closer to each other;
- If you want to finish the wall with wood planks, the spaces between the strips should be a bit wider; and
- Attach the furring strips vertically.
Materials
It’s best to prepare the materials before starting this project. You will need the following tools and materials:
- Measuring tape
- Pencil marker
- Anchors (Sleeve Anchors)
- Screws (Tapcon Concrete Screws)
- Furring strips
- Hammer drill
- Carbide-tipped masonry drill bits for concrete
Steps in Furring Out the Concrete Wall
Follow the directions below in properly spacing out the furring strips on a concrete wall. Take note that this method is best if you want a drywall finish attached to your concrete wall:
- Spread out the tape measure across the bottom of the wall. Use the pencil marker to mark a dot after every 16 inches of the way;
- Do the same thing at the top of the wall, and mark a dot after every 16 inches across the width of the wall;
- The dots will be the spots where you will attach the furring strips, vertically;
- Using the pencil marker, draw vertical lines from the bottom to the top of every corresponding dot marks. This line will ensure that the furring strips will be correctly attached to the wall vertically;
- Attach the anchors to the concrete;
- Take a furring strip. Line it up according to the vertical lines you have drawn up. Use the pencil marker to mark the spots where you will drill the holes on the concrete;
- Repeat this process across the width of the wall;
- Get the hammer drill and insert in it a carbide-tip drill bit. Ensure that the size of the drill bit will make holes that have the same size as the sleeve anchors;
- Drill holes into the concrete. The holes should be from 8 to 10 inches apart;
- Make sure that there is no debris left inside the holes. Get them out by using a wire brush or a shop vacuum;
- Get the sleeve anchors and insert them into the holes. They should fit snugly into the holes;
- Put a furring strip in its right position and start tightening the screw. Repeat this process across the wall width;
- Attach the dry wall or wood paneling; and
- You now have furred out your concrete wall.
Conclusion: Furred Out Wall
Builders fur out a wall by adding thin strips of wood or other materials. By doing this, the insulation of a home or a business is improved. A furred out wall will have its indoor spaces cooler in the summer and warmer in the winter.
It is one way of reducing your electric bills. Furring out a wall is a great way of saving electricity because you don’t have to use HVAC equipment that can cool or warm indoor temperatures. This is just one of the benefits of a furred-out wall. There are many more.
Read next:


![Read more about the article Best Gorilla Racks [Gorilla Shelves]](https://homecarezen.com/wp-content/uploads/2021/10/Best-Gorilla-Racks-300x200.jpg)